Signs your restaurant's grease trap needs cleaning
Odours, slow drains and backups can have several causes. Here is how to assess the next step.
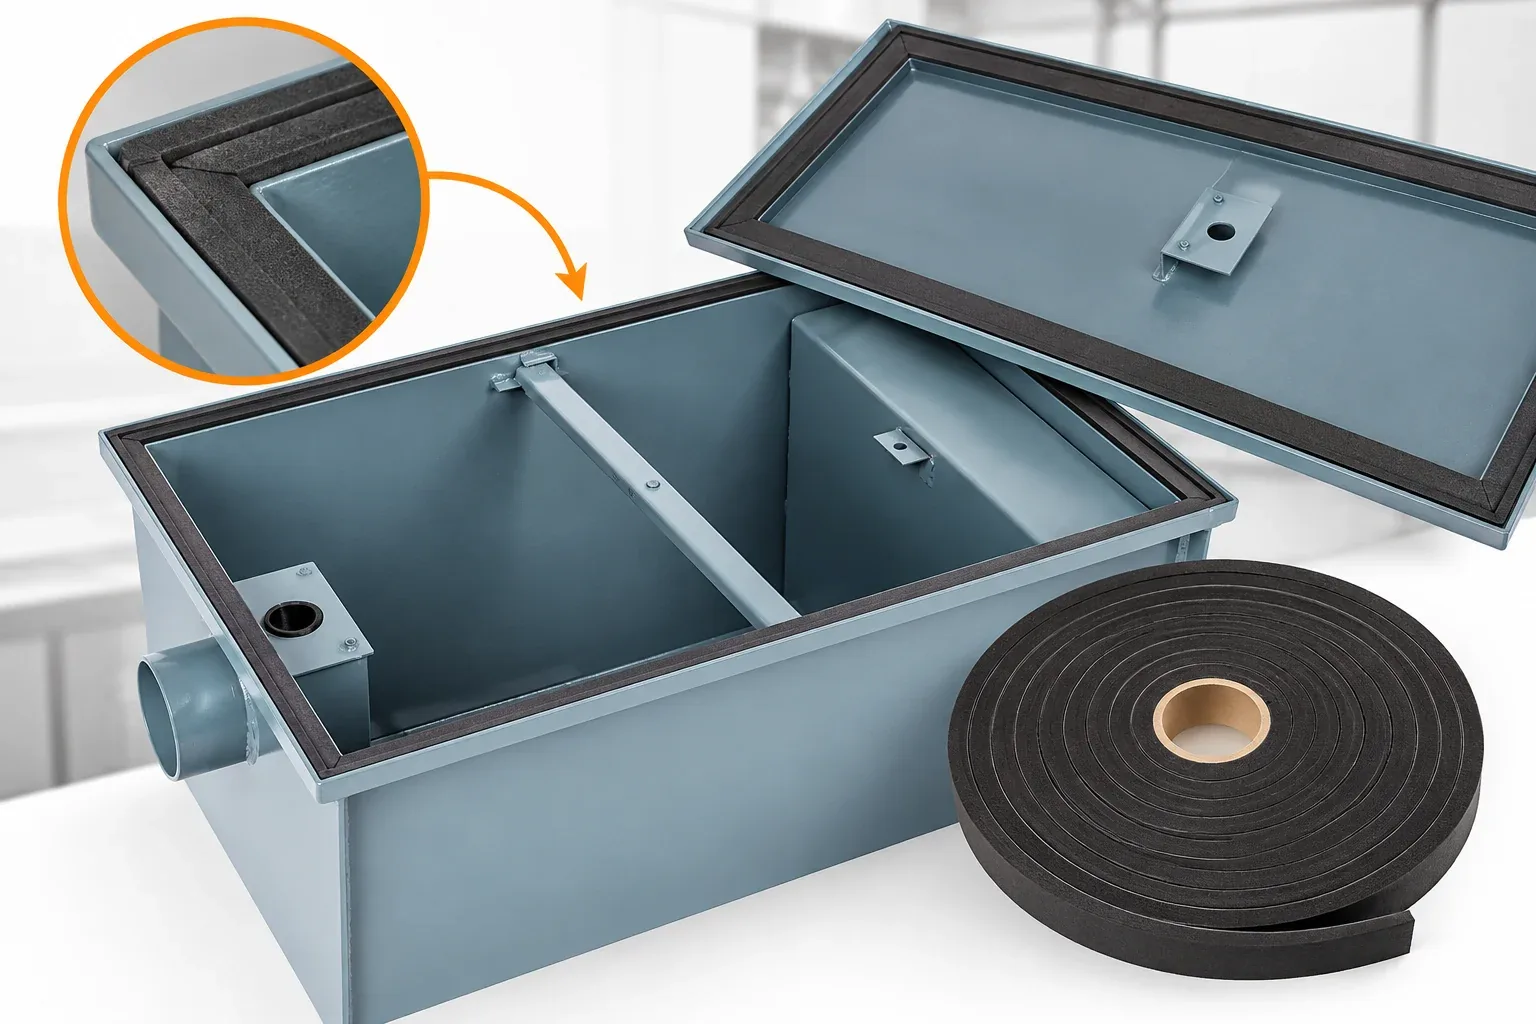
A grease trap lid gasket is a small component with a straightforward job: help the lid seal against the trap so grease, wastewater and odours stay where they belong. When the seal is worn, damaged or not seated correctly, a kitchen may notice odours, seepage or a lid that no longer sits properly. But a gasket is only one possible cause, and replacing it will not fix a full trap, a blocked line or a damaged lid.
Grease traps and interceptors vary widely in size, design and installation. The lid may be a heavy cover over an in-ground tank, a smaller cover on an under-sink unit, or an access cover on a hydromechanical interceptor. The gasket is the compressible material that sits between the lid and the tank, frame or cover surface. Depending on the model, it may be a flat gasket, an O-ring, a moulded profile or another seal supplied by the manufacturer.
Not every trap uses the same sealing method. Some lids rely on a gasket and fasteners; others use a different arrangement. The manufacturer's parts list and installation instructions are the reference for the specific unit. A part that fits one trap may not fit another.
A suitable gasket helps create a closer fit between the lid and the trap. That can help limit the escape of odours and liquid at the lid, reduce the chance of surface water or debris entering the trap, and keep the lid sitting more evenly. It also helps protect the lid and tank surfaces from movement or damage when the cover is secured.
The gasket is not a stand-alone solution. The lid must be the right one for the trap, the fasteners must be in place, the tank and lid must be sound, and the trap must be maintained. A new gasket cannot compensate for a cracked lid, a warped frame, a missing fastener or a trap that is overdue for cleaning.
Some problems are visible when the lid is opened for cleaning; others show up as symptoms between visits. Look for:
Some of these signs are obvious. Others are only apparent when the cover is removed, which is one reason routine cleaning and inspection matter.
A damaged gasket can contribute to odours or seepage, but it is not the only explanation. A trap that is full of grease and solids can produce odours even with a sound lid. A blocked or poorly vented drain line can cause gurgling, slow drainage and smells. A cracked tank or lid, a damaged fitting, a loose cover, a displaced baffle or a downstream blockage can produce similar symptoms. In some cases, the trap may be dry or the problem may be in the building plumbing rather than the trap itself.
That is why the right response is an assessment, not an automatic gasket replacement. If wastewater is backing up, stop using the affected fixtures and treat it as a plumbing problem. If the smell or seepage started after a service visit, tell the provider so the lid and gasket can be checked.
During a planned grease trap cleaning, the lid is removed, the contents are removed, and accessible internal components are cleaned and checked. The gasket, lid, fasteners and sealing surfaces can be inspected while the trap is open. A service record can note visible condition issues, access limitations and any recommended follow-up.
Grease Shields provides commercial grease trap cleaning and maintenance in St. John's and across the Island of Newfoundland. Where a concern involves the trap or its accessible components, we can explain what we find and discuss repair options within the support we offer. If the correct replacement part or work falls outside that scope, we will say so and point you toward the appropriate next step. We do not promise a gasket replacement as part of every cleaning visit.
Municipal guidance such as Metro Vancouver's grease interceptor cleaning guide for service providers and the City of Calgary's monitoring and maintenance guide both emphasize careful lid removal, gasket inspection and correct reassembly.
Cleaning removes grease, solids and residue from the trap and accessible components. It may be enough if the gasket is intact but soiled, slightly displaced or not seated because of debris.
Repair addresses a physical fault, such as a damaged lid, a failed fastener or a sealing surface that no longer holds. Replacement means fitting a new gasket or lid component. The correct choice depends on the condition of the part and the trap.
A gasket that is cracked, torn, hardened or permanently deformed is unlikely to be restored by cleaning. A generic bead of sealant is not a substitute for the correct gasket. The replacement should match the trap model, lid, dimensions, material and fastener arrangement specified by the manufacturer or an equivalent part intended for that application.
If you notice a leak, odour or a lid that no longer seals:
Managers do not need to diagnose the gasket. The useful step is to describe the symptoms and let a trained person inspect the accessible components.
It can contribute, especially if the lid is not sealing. But a full trap, a venting problem, a dry trap or a downstream issue can also cause odours. The smell alone does not identify the cause.
There is no universal interval. Replacement depends on condition, not a calendar. Inspect the gasket during cleaning and replace it when it is damaged, hardened, deformed or no longer seals. The manufacturer's guidance for the trap is the best reference.
Gasket replacement may look simple, but the lid can be heavy, the trap may be below grade, and the correct part must match the model. Access and confined-space hazards are real. A qualified service provider should assess the trap and carry out the work safely.
If your restaurant is in St. John's or elsewhere on the Island of Newfoundland and you have noticed odours, seepage or a lid that no longer sits properly, Grease Shields can inspect the trap during a cleaning visit and explain what we find. See the grease trap cleaning and maintenance service or request a quote. For the broader maintenance picture, read our grease trap maintenance guide and the warning signs to watch for.